 Editor’s Note: 2018 Best Horse Practices Summit presenter Katrin Silva grew up riding dressage in Germany before moving to the United States at age 19 to learn to ride Western. She’s been riding both disciplines for the last twenty years and is a regular guest columnist for Cayuse Communications. She lives in New Mexico where she works with dressage and Western clients. Visit her blog here.
Read more about her exciting, informative arena presentation at the Summit with Amy Skinner here.
Read Part I of this article here.
Silva writes:
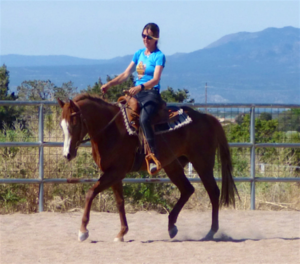
Once your horse’s body is in correct alignment, he will want to stretch forward and down because it feels good.
Why wouldn’t your horse do something naturally if it feels good?
 It’s a matter of habit. Many horses are so used to carrying a rider with a hollow, tense back that it feels normal to them. It’s not comfortable to travel like that, but it feels familiar. Once we show the horse the way down into a stretched frame, they realize that there’s a better way to carry a rider.
However, you can’t force a horse into a stretched frame. You can only make sure that the horse is going forward, with energy and without rushing, on a circle with correct body alignment. Be patient.
- Keep light contact with the horse’s mouth while being ready to give the reins at the first inkling of a stretched neck.
- Keep spiraling.
- Keep bending.
- Keep riding forward.
Every time your horse thinks about lowering his neck, immediately give him a longer rein while pushing him forward, encouraging him to stretch over his back. A stretch without forward energy won’t have the gymnastic benefits you’re looking for: a swinging back and a relaxed top line.
 Again, this work is easiest at the trot, but eventually a horse should be able to stretch forward and down in all three gaits.
Developing a Working Frame
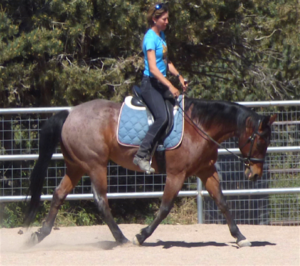
A working frame is not a “head set.” A working frame involves shifting the horse’s balance toward the hind end. In turn, the front end becomes lighter and more maneuverable.
Once your horse stretches consistently forward and down in both directions“it’s time to gradually shift more of the horse’s weight toward the hindquarters, which will raise his neck and front end into a slightly higher frame.”
To do this, ride lots of transitions between the gaits and try to make them as smooth as possible by using your seat more than your hands. Before your horse gets too comfortable in any one gait, ride another transition. This will make your horse more responsive to your aids. It will also help develop longitudinal suppleness.
[There are two kinds of suppleness: lateral, i.e. left to right and vice versa, and longitudinal, i.e. along the horse’s spine, from the back end to the front end. A horse that is longitudinally supple allows the rider’s aids to direct energy forward from the hind end, gather it with a half halt, and then recycle that energy into a more expressive trot or canter, and a more swinging back.]
 Once you can ride smooth, prompt, clean walk-trot transitions in quick succession, it’s time to start with “almost-transitions.” Sometimes, when asking for a walk from the trot, change your mind at the last second and push your horse forward again, into a slightly more energetic trot. You will feel the horse’s weight shift back toward his haunches. This is an excellent way to introduce the half-halt.
[The half halt has mental and physical components. On a mental level, it’s a check-in with the horse, a way of saying “Are you ready? Okay, here’s what we’ll do . . .” On a physical level, it is a rebalancing tool that shifts the horse’s balance onto the hindquarters, which gets the horse’s body ready for a transition, turn, or whatever else. At this introductory stage, the half halt is literally half of a halt, or an almost-down transition.]
Of course, after a successful half halt or two, it’s time to ask for an actual transition.
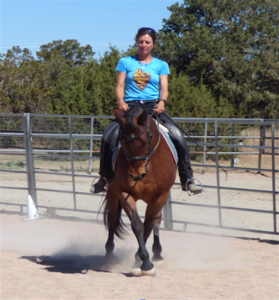
Another good strategy to gather your horse into a working frame from a stretched frame is to ride your horse in shoulder-fore, and later in shoulder-in. Shoulder-fore means that you take the bend of your large circle onto a straight line.
Take a break and do something different.
Try it along a fence if you can. The horse’s shoulders should be a little off the rail, with the horse’s inside hind leg tracking between the two front legs. As with the circle, focus on the horse’s body alignment. The neck should not bend more than the rest of the horse. Once you can ride a shoulder-fore both ways, increase the angle until you have a shoulder-in, where the horse’s inside hind leg tracks toward his outside front leg. At that point, it’s fun and challenging to ride transitions in shoulder-fore or shoulder-in.
Keep your work sessions fairly short. Twenty to thirty minutes of focused work are plenty in the beginning. Find a good note to end it on. Then, do something completely different, especially if this type of riding is new for your horse.
Keep your work playful. Don’t drill the same exercise for too long. Be happy with a little progress. Praise your horse. Switch directions. Or move on to something completely different, like a trail obstacle. And most importantly, be patient. Your horse will thank you.